Table of Contents [expand]
Last updated May 30, 2024
This article is for developers interested in creating add-ons for Heroku’s add-on marketplace. For information on using add-ons in your Heroku app, see Add-ons.
Add-ons are cloud services that extend Heroku apps with useful features and services, such as:
- Data stores
- Logging
- Monitoring
- Content management
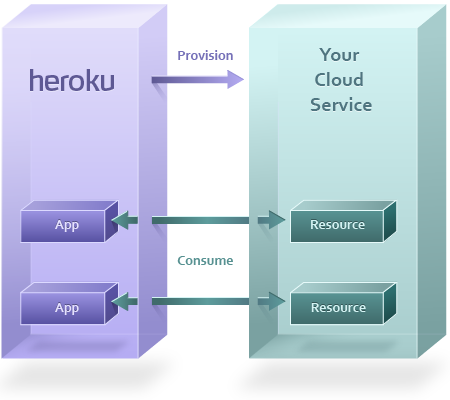
An add-on interacts with a Heroku app in one or more of the following ways:
- It sets one or more config vars in the app with values necessary to communicate with the add-on. These values typically include the cloud service’s URL and any credentials necessary to access that URL.
- It reads or writes to the app’s logs.
- It uses the Heroku Platform API for Partners to perform app management actions (such as dyno scaling) on behalf of the app’s developer.
Every add-on has one or more plans. Each plan has its own price and associated set of features. When a developer provisions an add-on, they choose which plan they want, and they can change their choice at any time. Billing for add-ons is integrated into standard monthly Heroku billing.
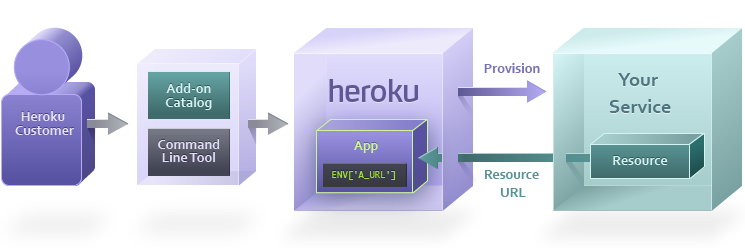
The add-on provisioning flow
Developers use the Heroku Elements Marketplace or the Heroku CLI to provision an add-on for their app. When this happens, Heroku sends a request to the add-on, and the add-on allocates a new resource for the app. This resource represents the association between the app and the add-on:
The following sections describe the provisioning flow in greater detail:
Step 1: The developer initiates provisioning
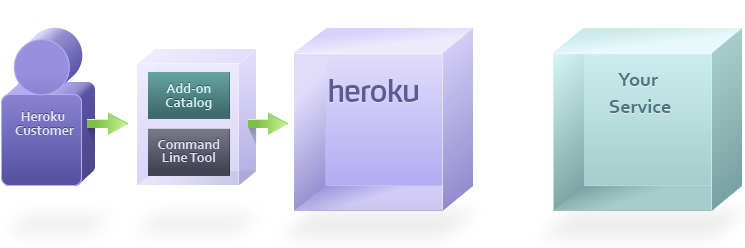
The provisioning process begins when a developer finds your add-on in the add-ons catalog and clicks the Install button. Alternatively, they can use the Heroku CLI:
$ heroku addons:create addon-name
Step 2: Heroku requests service provisioning
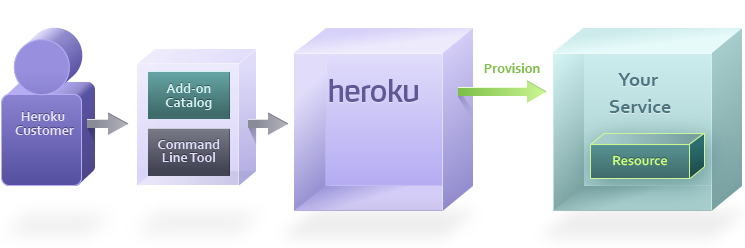
The structure of the resource(s) your add-on provisions depends on the type of service you’re providing.
In almost every case, you should provision a user account. If you’re developing a data store add-on, you’ll probably also immediately provision a new database resource. An exception-reporting service might provision a unique API key in addition to typical user credentials.
Step 3: The add-on returns a resource URL
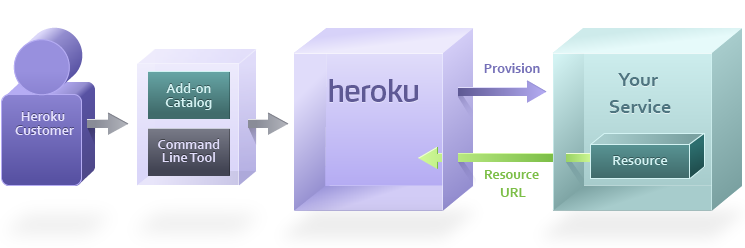
After the resource is provisioned, your add-on responds with a URL that the app can use to access its associated resource.
For example, a database partner like Amazon RDS might return the following URL:
MYSQL_URL=mysql://user:pass@mysqlhost.net/database
A general partner such as New Relic might return a typical HTTPS URL, like so:
NEW_RELIC_URL=https://newrelic.com/accounts/[apitoken]
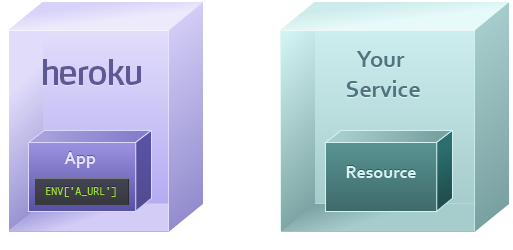
Step 4: Heroku rebuilds the app
Heroku adds your add-on’s returned URL to the app as a config var. It then rebuilds the app and restarts all of its dynos.
The Heroku app is now ready to consume the resource your add-on has provisioned for it.
Interacting with an add-on
A Heroku app interacts with an add-on at different times and in different ways depending on the add-on’s purpose. For example, a Heroku web app might want to consume an add-on’s database resource to fetch all associated records for a particular table view.
Step 1: The app accesses its resource URL
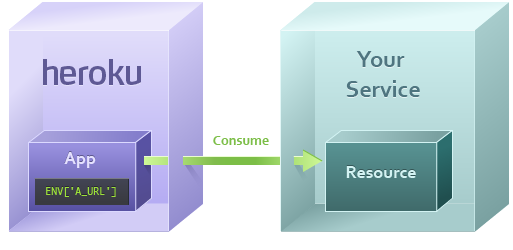
The app accesses the add-on resource with the URL that was stored as a config var during the provisioning flow.
Datastore resources (such as MySQL, MongoDB, or Memcache) have their own protocol and use a client library such as ActiveRecord, MongoMapper, or MemcacheClient to access the resource. These URLs for these resources start with the appropriate protocol (mysql://, mongo://, memcache://, and so on).
Web service resources (such as Exceptional or New Relic) use https:// as their protocol.
Step 2: The add-on resource responds
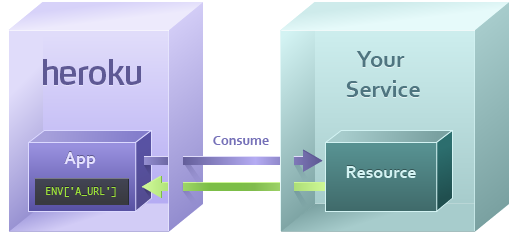
Your add-on’s resource can now process the incoming request from the app, assuming its credentials are valid.
If the request is a read request (such as a SQL SELECT or an HTTP GET), the resource looks up the requested information to return to the app.
If the request is a write request (such as a SQL INSERT or an HTTP POST), the resource stores the payload included in the request and returns an acknowledgment.
After the app receives your resource’s response, it can use it however is appropriate for its current task.
Updating config var values
An add-on can update the values of config vars it’s set for an app at any time. This is helpful for use cases such as refreshing an expired or compromised credential.
An add-on cannot access config vars that were not created by that add-on.
The add-on dashboard
Every Heroku add-on has its own dashboard that customers can access from the Heroku Dashboard or the Heroku CLI. Your add-on’s dashboard should provide whatever information and configuration options are applicable to the service you provide.
When a customer accesses your add-on’s dashboard, Heroku uses single sign-on (SSO) to confirm the customer’s identity to your app. This lets you log the associated user in automatically to provide a seamless experience.
The single sign-on flow
When customer performs an action to open your add-on’s dashboard from the Heroku Dashboard or CLI, Heroku generates a single sign-on token using your resource’s ID, the current time, and your add-on’s salt (a secret shared between Heroku and your add-on).
It then sends a POST request to your add-on with the following format:
POST https://yourcloudservice.net/sso/login
id=123&token=4af1e20905361a570×tamp=1267592469&user@example.com
Your add-on can then confirm that the token matches and the timestamp is fresh. You can set a cookie in the customer’s browser to indicate that they are authenticated, then redirect them to their add-on dashboard.
Logging users in via SSO
You can also use Heroku SSO to create customer-specific URLs that direct users to their dashboard automatically.
SSO URLs have the following format:
https://addons-sso.heroku.com/apps/:app_uuid/addons/:addon_uuid
The value of the addon_uuid parameter is the UUID provided in the customer’s original provision request.
The value of the app_uuid parameter can be retrieved using a Platform API Add-on Info request.
An example SSO URL looks like this:
https://addons-sso.heroku.com/apps/c0e83e46-9803-46bd-86ca-e7e40a8cce8d/addons/c2aef419-7834-405b-8c28-f014d4fecde7
You can include additional information in SSO URLs as query parameters. These keys and values are submitted alongside the rest of the customer’s data via SSO POST. This allows you to set relevant state or context for the user within your dashboard
For example, this SSO URL adds the custom query parameter issue_no:
https://addons-sso.heroku.com/apps/:app_uuid/addons/:addon_uuid?issue_no=42
Next: Building an Add-on