Table of Contents [expand]
Last updated March 05, 2025
Deploy Heroku apps from your VS Code workspace with the Heroku VS Code extension. You can make changes to your apps locally and deploy those changes directly from VS Code.
Prerequisites
- VS Code with the Heroku extension installed
- A valid workspace with an
app.jsonfile - An authenticated Heroku session
- A clean working directory
Deploy to Heroku
- Open your VS Code workspace.
- Select the Heroku extension in the Activity Bar.
- Click
Deploy to Heroku.
Configure Your Deployment
The extension reads your app.json file to:
- Set up the required configuration
- Display optional settings
- Show helpful descriptions
- Pre-fill default values
To deploy to Heroku:
- Optionally, enter your app name.
- Complete required config vars if defined in the
app.json. Input validation occurs for required values. - Set the
App ownerandSpaceif applicable. - Click
Deploy app.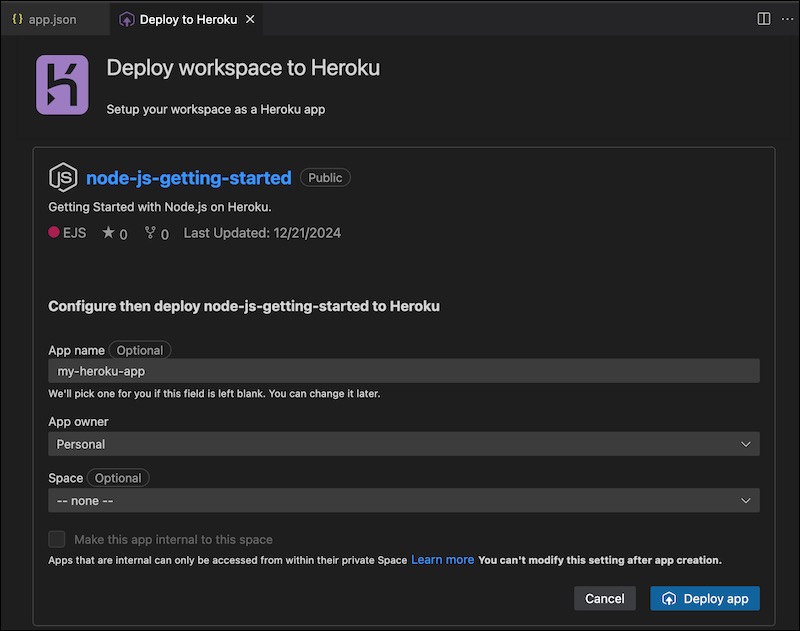
Monitor Deployment Progress
You can track deployment progress in real time in the Output panel.
During deployment, you see:
- Real-time progress updates
- Current deployment stage
- Status messages
When deployment completes successfully, a success message appears. You can then view your app details and begin managing your app in VS Code.
Troubleshooting Deployment
If you encounter issues:
- Check the error messages.
- Verify your configuration.
- Confirm all required fields are complete.
- Attempt to deploy the app again.
Next Steps
After deploying, you can manage dynos, view app logs, and set up additional resources in VS Code.