Last updated November 05, 2025
How it works
Heroku ChatOps uses the power of Heroku Pipelines to bring a collaborative deploy workflow to Slack.
Heroku ChatOps also provides some additional features over a traditional Heroku deploy. When you deploy using Heroku ChatOps, we’ll check the commit’s status checks on GitHub to ensure that you’re only deploying code with passing tests. We’ll also notify GitHub that your code has been deployed so that your pull requests will have a record of successful or failed deploys.
Getting started
Prerequisites
Installation and setup of Heroku ChatOps requires Slack permissions to add and approve apps. More information on Slack app management is available here.
Since Heroku ChatOps is built around pipelines, your applications need to be in a pipeline to take advantage of ChatOps features.
Click here to get started:
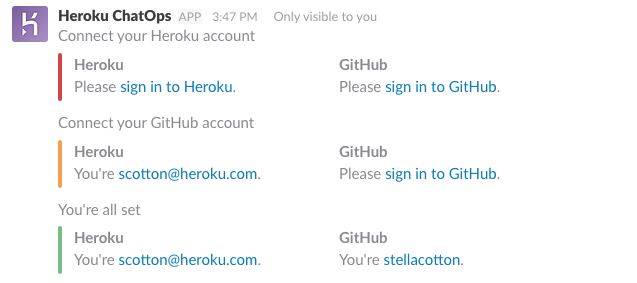
Setup your account
/h login
Permissions
To use Heroku ChatOps, you need to sign in to Heroku and GitHub. Any permission you have in ChatOps comes directly from the permissions you have in Heroku and GitHub.
Heroku
If you’re either the owner or a collaborator on an app, you have all the required permissions to use ChatOps on that app.
If you’re member of a Heroku Enterprise Team, you need to have the deploy permission to use ChatOps on an app.
GitHub
Ensure the GitHub repository is connected to your pipeline via the pipeline’s Settings tab.
If you’re either the owner or a collaborator on the GitHub repository that is linked to your pipeline, you have all the required permissions to use ChatOps on that pipeline.
If you’re member of a GitHub Organization, you need to have the write permission to use ChatOps on that pipeline.
Deploying code to an app
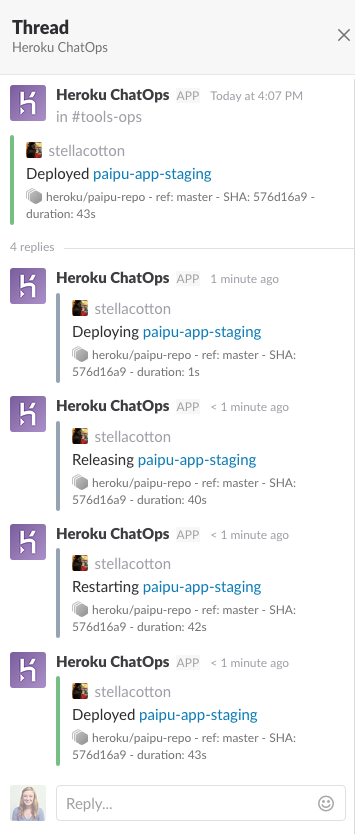
There are two ways to deploy your code to an app using Heroku ChatOps, the deployment flow or pipeline promotions. With both deploys and promotions, we use Slack threads to provide updates along the way, from when the deployment or promotion starts, to when your last dyno finished restarting.

Each step is saved in a thread:
Deploying
Basic deployments
/h deploy PIPELINE_NAME to STAGE_NAME

Deploying a specific branch
/h deploy PIPELINE_NAME/BRANCH_NAME to STAGE_NAME

Deploying when you have multiple apps in a stage
/h deploy PIPELINE_NAME to STAGE_NAME/APP_NAME

Forcing a deployment even if pre-deploy checks are failing
If you try to deploy an app when a status check is failing , it will refuse to deploy.

You need to force the deployment using deploy!.
/h deploy! PIPELINE_NAME to STAGE_NAME

Promoting
Pipeline promotions have a few additional benefits over manual deployment workflows. For example, they ensure that a release to production contains the exact same compiled code as a release to staging, and promotions will also be faster than recompiling the slug.
Basic promotions
By default, it will promote from staging to production.
/h promote PIPELINE_NAME

You can also specify an upstream stage. It will promote from the specific upstream stage to production.
/h promote PIPELINE_NAME from UPSTREAM_STAGE

Multiple apps in a stage
If you have multiple apps in your upstream stage, you’ll need to specify a source app to promote from.
/h promote PIPELINE_NAME from UPSTREAM_STAGE/APP_NAME to DOWNSTREAM_STAGE
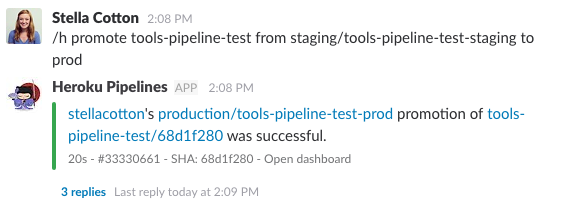
If you have multiple apps in the downstream stage, you’ll need to specify which downstream app you’d like to promote to.
/h promote PIPELINE_NAME from UPSTREAM_STAGE/APP_NAME to DOWNSTREAM_STAGE/APP_NAME

Or you have multiple apps in the downstream stage, you can also specify a list of target app separated by a comma.
/h promote PIPELINE_NAME from UPSTREAM_STAGE/APP_NAME to DOWNSTREAM_STAGE/APP_NAME,APP_NAME2
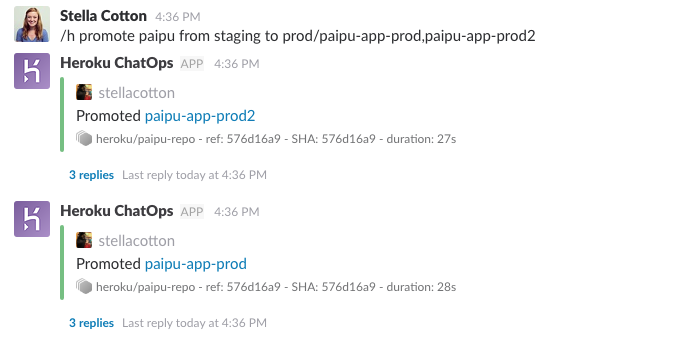
Or another way to promote to multiple apps in a downstream stage is by specifying that you’d like to promote to all downstream apps.
/h promote PIPELINE_NAME from UPSTREAM_STAGE/APP_NAME to DOWNSTREAM_STAGE/all
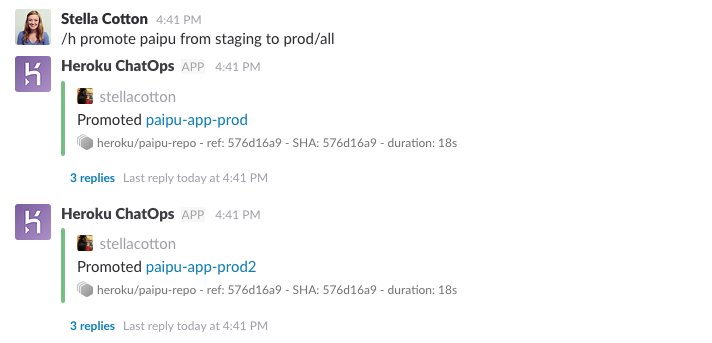
Forcing a promotion even if pre-deploy checks are failing
If you try to promote an app without having successful status checks, it will refuse to promote. You need to force the promotion to bypass the check.
/h promote! PIPELINE_NAME

Viewing latest releases
You can view the latest code deploys and configuration changes for the default stage.
Releases for production stage
/h releases PIPELINE_NAME
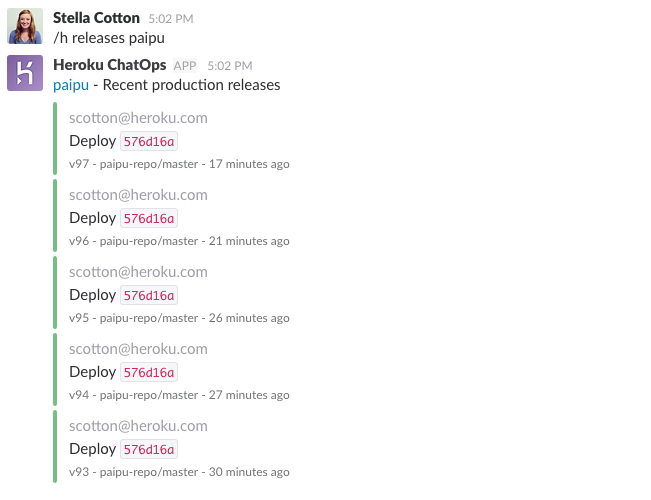
Releases for a specific stage
You can also specify a stage, like staging or production.
/h releases PIPELINE_NAME in STAGE_NAME
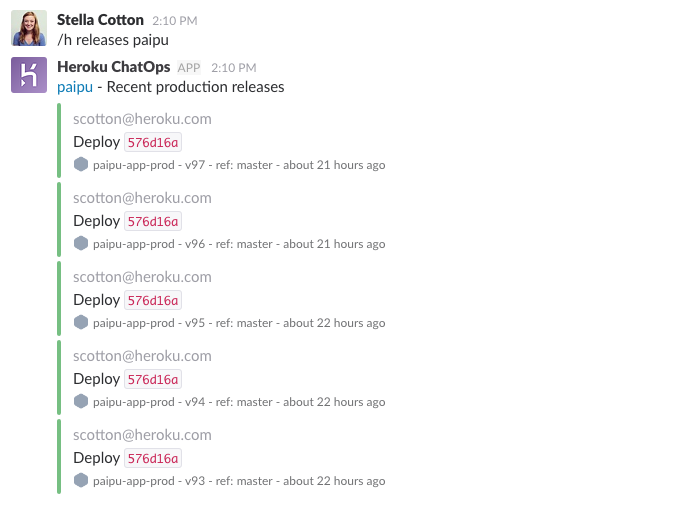
Pipeline information
/h info PIPELINE_NAME
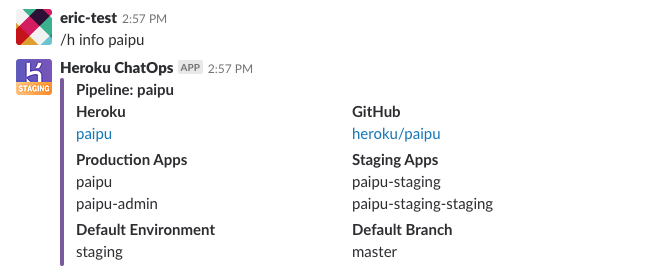
Deployable pipelines
You can obtain a list of deployable pipelines.
/h pipelines

Connecting CI and other pipeline events to your Slack
If you’d like to be notified about pipeline events, like a pull request opening, a Heroku dashboard deploy or promotion occuring, or your CI tests passing, you can route notifications to any public Slack channel.
Route pipeline notifications to a channel
/h route PIPELINE_NAME to #CHANNEL_NAME

Once you route your pipeline notifications to your channel, you’ll start receiving notifications. Here’s an example of a CI notification:

Pipeline notification routing currently only supports a single Slack channel. Pipeline events initiated from the CLI are not displayed.
Stop routing Pipeline’s notifications to a channel
You can also disable notifications for a pipeline.
/h route:disable PIPELINE_NAME

List Pipelines routed to a channel
/h route

Change notification settings of pipelines routed to your channel
Run /h route inside the channel you wish to configure and select the pipeline from the dropdown.
You can customize the messages in your channel by toggling ChatOps’ notifications settings
Each pipeline routed to your channel has the following settings:
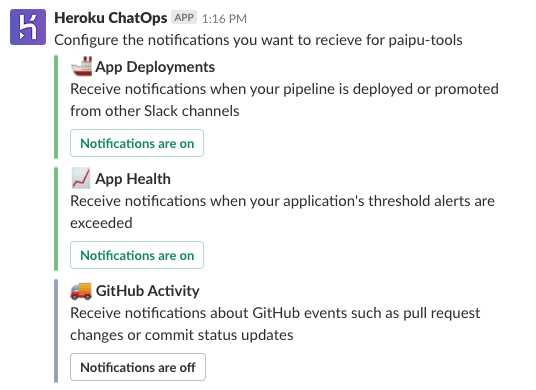
App deployments
Receive notifications when your pipeline is deployed or promoted from other slack channels. You’ll still receive updates inside the channel where you run the Heroku ChatOps command.
App health
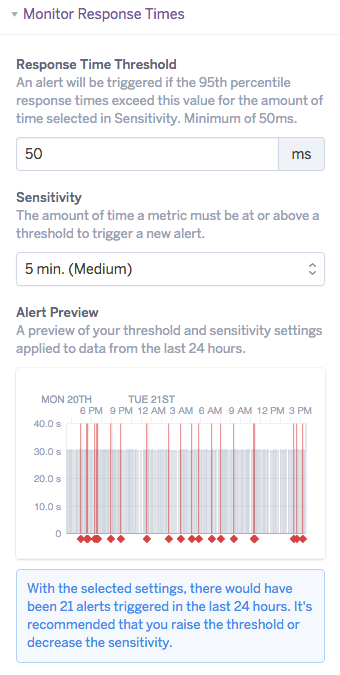
App health threshold alerts allow you to monitor application health by sending a notification if the p95 response time or error rate for your app’s web dynos exceeds your configured threshold setting for a specified period of time. Once you have a pipeline routed, you’ll can receive Threshold Alert notifications for any alerts configured for pipeline apps.
Alert monitors are configurable in Application Metrics.
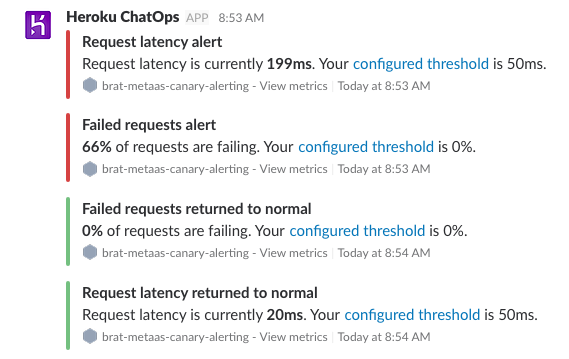
Within Slack you’ll see receive a notification for the alert and when app health returns to an acceptable state. Clicking on the message links will take you to Application Metrics for further investigation or to adjust alert threshold settings.
Github Activity
Receive notifications about Github events such as pull request changes or commit status updates.
Uninstalling
To remove Heroku ChatOps from a Slack channel, navigate to the app’s settings page in Slack and select Remove App. You can get to the settings page by selecting the Apps header on the sidebar, View Heroku, then selecting Settings. For details, see Slack’s help center article.
Known Limitations
ChatOps does not support routing notifications to private Slack channels or teams using Github Enterprise.
Frequently Asked Questions
What permissions does ChatOps require?
Heroku account permissions: when you /h login to connect your Heroku account to Heroku ChatOps, it asks for the following permissions: Read and write access to all of your account, apps and resources.
Those permissions are required to perform operations such as listing your pipelines and deploying or promoting an app.
GitHub account permissions: when you /h login to connect your Heroku account to GitHub, it asks for the following permissions: access to your account, your public and private repositories.
Those permissions are required to perform operations such as checking status checks on commit statuses or creating deployments on a Pull Request.
Can I limit the Heroku Apps or GitHub repositories that ChatOps has access to?
Heroku ChatOps allows you to control any Heroku app that you personally have access to but there are no finer grained controls beyond that. It also does not allow other people in your Slack to control those apps unless they also have permission to access the apps.
GitHub Apps allow for finer grained control on repositories, but that has not been integrated into Heroku ChatOps yet. We cannot commit to a timeline but it’s definitely on our radar. Keep an eye on the Heroku Changelog.
Does Slack have access to my GitHub or Heroku account?
No, only Heroku ChatOps has access to your GitHub and Heroku account. Your GitHub access token and your Heroku access token are never shared with Slack.
Why do I get this “Please make sure you have access to this GitHub repository" error?
You are the owner of the GitHub organization or repository and when you try to use ChatOps to deploy, you get the following error:
Unable to access XXX
Please make sure you have access to this GitHub repository.
Read more about permissions and try to sign in to GitHub again.
Normally that error gets triggered when the user’s GitHub token gets a 404 accessing the connected repository. In some cases, tighter restrictions on the GitHub side can make it so a configured pipeline is unable to be accessed by a user in ChatOps. It appears that permissions are likely not correct.
Please follow those 3 steps:
- in Slack, type
/h logoutthen/h login. Connect your Heroku and GitHub accounts then try again. - make sure that the GitHub user has Admin privileges in the GitHub UI > repository_name > Settings > Collaborators & teams for the repository.
- visit the OAuth Application authorizations in https://github.com/settings/applications > Authorized OAuth Apps > Heroku ChatOps and make sure the appropriate Organizations have a green checkmark.
